Table of Contents
Moving up and down in Minecraft is tedious and time-consuming when you’re not using speed hacks or fly mods. Water elevators in Minecraft offer a vertical transport system for mobs, players, and items moving between different floors of a structure. The elevators use water as the transport medium. These elevators can either be simple, which requires the player to either swim or walkthrough, or complex where a player is transported to higher levels by a simple button click. Water elevators will help you access deep levels of your mineshaft or your secret base high in the sky. Creating a water elevator requires less expertise and materials.
How to Make a Water Elevator?
Depending on the base used, water elevators will help you move up and down. An elevator that moves upwards will require a Soul Sand base while a downward movement will require a magma block base. To make a water elevator you will require to equip yourself with the necessary materials. These include glass, door, kelp, water bucket, two signs of any kind, Soul Sand, for upward mobility, and magma for downward movement.
About Water Elevator in Minecraft

Using a water elevator in Minecraft is relatively simple. The number of blocks needed is determined by how high you want the elevator to be. Soul Sand blocks are good for creating upward water elevators while magma blocks are efficient for downward movement. Soul Sand can be easily found in sand biomes while magma blocks will be found in nearby lava. Ocean biomes are also a good source for magma blocks in the overworld. When building a water elevator, utilize any block you feel will make it look unique and appealing. Glass blocks help you look around the surroundings when moving up and down.
Step by Step Guide on How to Make a Water Elevator in Minecraft
Water elevators are one of Minecraft’s tricks to help you achieve milestones while playing the game. Unlike a Redstone elevator that requires a lot of skills to build, building a water elevator is quite simple and straightforward. Follow these simple steps to build a water elevator;
Build an Enclosure

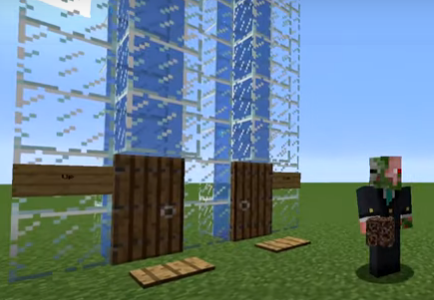
The first step is to build an enclosure that will act as the elevator. You can use any kind of material to make the enclosure. For visibility, most people use glass. Its dimensions are dependent on the player. There is no limit to the length, breadth, or height of the elevator. Layout the elevator’s frame then build one block shaft going upwards or downwards.
Fill the Enclosure with Water Source Blocks
After the enclosure is complete, use water source blocks to fill it. Ensure that there is no flowing water present in the enclosure.
Add Signs
For every block in your shaft, make sure you add the signs. After adding the signs, leave an empty space on the top and bottom of the shaft.
Place the Base Block
Depending on the type of elevator you want to make, upwards or downwards, place the base block. Remember, for upward movement, use a Soul Sand block and for a downward movement, use a magma block.
Creating a Down Shaft

Creating a down shaft is easier compared to an upward shaft. Simply dig a three-deep hole in the ground and fill water in it. Add blocks to surround the hole. That’s it!
Water Elevator is Complete
After following the above steps, you see bubbles in the water, an indication that the water elevator is functional. You can now use the water elevator as a transportation system.
How to Make a Water Elevator in Minecraft with Soul Sand?
To create a water elevator in Minecraft with Soul Sand, follow these steps;
- Equip yourself with all the necessary materials, for example, glass, water bucket, kelp, and Soul Sand. You will need to dive into the water to collect the Soul Sand.
- After assembling all the necessary equipment, make your glass enclosure. It should be hollow in the middle with an opening at the top and bottom. You can choose how high and wide the enclosure needs to be. This is dependent on how much distance you want to travel. Ensure to leave a two-block tall hole that you will use to enter the elevator.
- Move into your elevator and place the door in the open space, with your back on the elevator. This ensures no leakage of water outside the elevator.
- Fill the elevator with water using the water bucket and from the top block. This makes the water flow between your elevator’s glass blocks.
- Place kelp in your water to make every flowing water block be a source block.
- Replace the bottom block with Soul Sand. This automatically makes the elevator push upwards. Placing the Soul Sand block prevents you from drowning inside your water elevator.
Making Water Source Blocks
You can use various methods to make water source blocks in Minecraft. Besides using a bucket, the following are other methods that you can use;
Creating Infinite Water Source
Simply dig a 2 X 2 wide hole that is one block deep and place the water source diagonally. After placement, water stops flowing giving you an infinite water source. Use buckets to take as much as you want.
Using Kelp

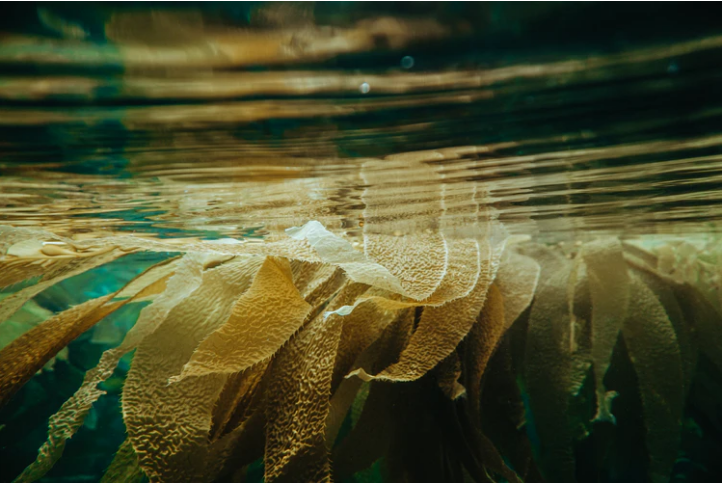
Kelp is readily available in any ocean. Kelp makes any flowing water turn into a water source block once placed in the flowing water. After the conversion of the flowing water into water source blocks, the kelp can be removed. This method is highly efficient in the construction of water elevators in Minecraft.
In Summary
Water elevators are very useful when you want to move up and down in your base. A Soul Sand base block will make your elevator move upwards while a magma base block will make your elevator move downwards. A properly constructed water elevator will make your move up and down in less than a minute. Learning how to make a water elevator in Minecraft will help you make fast and efficient transportation designs. Not only water elevator Minecraft is a game of different engineering concepts, for example, but you can also make a concrete powder which is useful for a Civil engineer to learn about concrete making.

